Castable Telescopic Screw Attachment
The cast able telescopic screw attachment (Preat Corporation) is a treatment plan alternative when only one implant is available for support. This eliminates the need for an occlusal opening that would accompany a standard key latch or tube and screw attachment. Since this is a castable pattern, any suitable metal may be used. This system may be used in conjunction with abutment telescopic copings. A minimum of 4.5 mm of vertical space from tissue to opposing tooth contact is required.
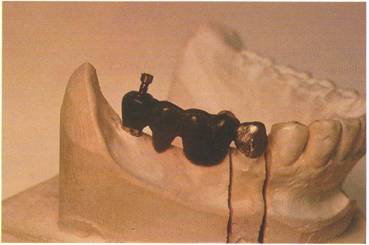
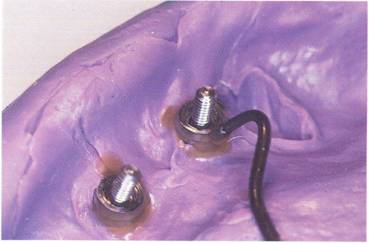
The abutment restoration is waxed to receive the male attachment. This male attachment is waxed directly over the crest of the ridge and in tissue contact.
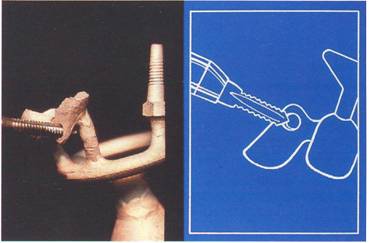
The castable screw and abutment male attachment pattern are sprued, invested, and cast following the pro-tocol described in Chapter 4. Devest the castings. Do not remove from the button. The male thread cleaner is used to refine the internal threads.
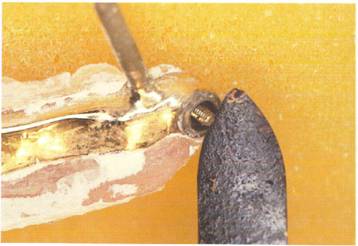
The female thread cleaner must be used to refine the screw threads. Complete rubber wheeling and pol-ishing of the shank portion of the screw before sectioning from the button.
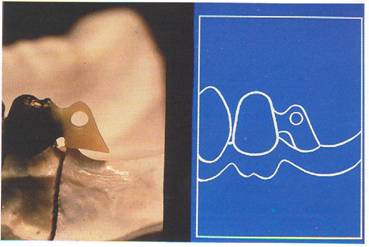
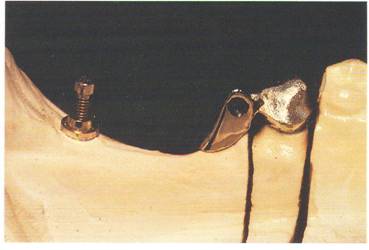
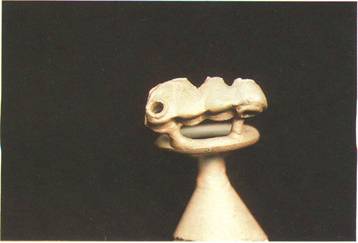
The male attachment is polished and the crown portion is finished to receive the porcelain. The area of the Br_.nemark System abutment is indicated by the gold screw.
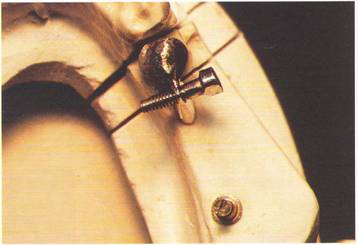
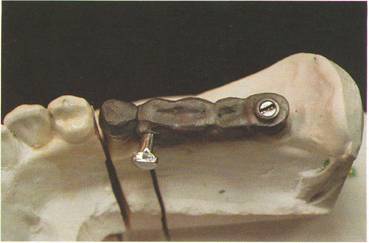
Lubricate the cast abutment restoration and the attachment male and screw. Thread the screw fully into the threaded recess with hand pressure.

Back the screw out 1/4 turn. Cut off excess screw threads. It is recom-mended that the screw insert from the buccal side for easy access.
If esthetics are a problem, insert the screw from the lingual.
The remaining portion of the sub-structure pattern is waxed around the screw and male attachment. The gold cylinder is screwed into place on the fixture replica and incorporated into the pontic wax-up.
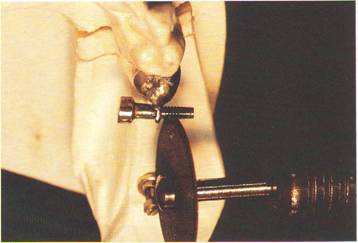
The pattern is sprued, invested and cast.

Devest and finish casting. A metal ring margin is finished around the attachment screw.
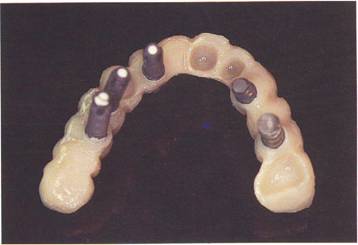
The metal is cleaned, degassed, and opaqued. Gingival and incisal porcelains are blended, contoured and baked.
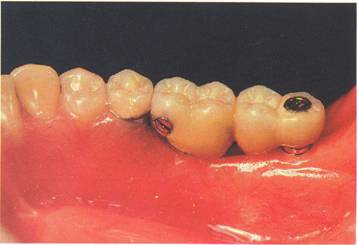
The case is tried intraorally and all adjustments are made.
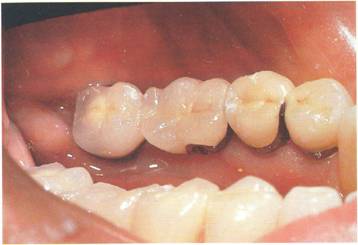
A buccal view of the firtished prosthesis. Note the proper occlusal anatomy without screw access hole filler or attachment hardware visible.
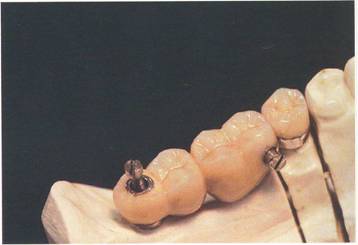
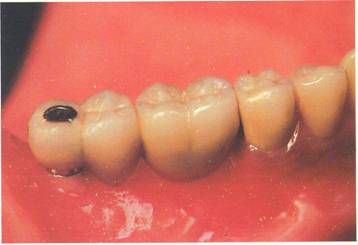
The ijngual view illustrates good anat9niical tooth contour incorpo-rating the telescopic screw assembly
Full Arch Maxillary Temporary Splint
This full arch master impression incorporates natural tooth abutments, impression copings and all necessary soft tissue areas
Each coping is sealed lightly to the impression with wax
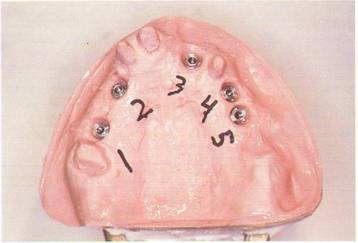
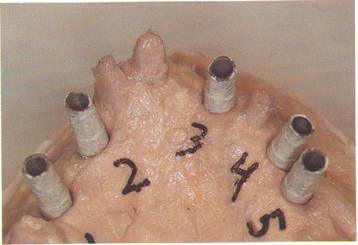
The fixture replicas are screwed into place and the stone cast is poured.
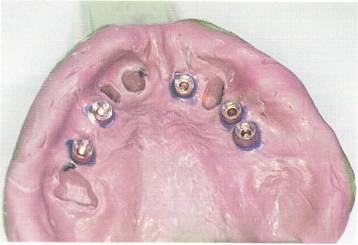
The implant sites are numbered on the cast.
The clear plastic stent is vacuum formed over the study cast of the patient's previous dentition. This stent is very valuable in determining tooth'position, size and occlusal relationships.
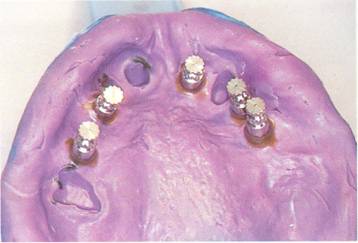
All cylinders are sandblasted, ultrasonically cleaned and treated with light-cured opaque (Kulzer Co.).
The master cast is lubricated and all opaqued temporary cylinders are correctly placed numerically. Waxing procedures can now begin.
NOTE: If fixture placement and access hole position are not esthetic, problem solving abutments can now be selected. Using the articulated casts, we now have a gauge to determine proper abutment size and angulation. With this information, optimum results can be achieved in the final prosthesis.

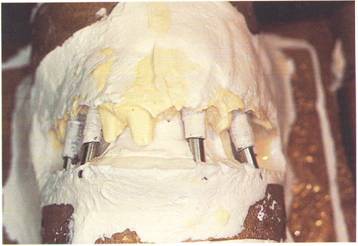
Upon completion, the wax pattern is removed from the cast. The final contour and additions are made and the fixture replicas are fastened to the cylinders with laboratory guide pins. A, processing model is poured as per protocol in Chapter 3. The case is invested in an arch form flask following normal techniques.
The separated flask after boilout. Separating liquid is applied to stone areas in contact with the acrylic. Shade-matched acrylic (HI-I, Fricke Dental) is mixed to ratio, packed and pressed. After the gingival shade is cured, it is cut back from the incisal, interproximal and occlusal areas. A beveled slope is cut into the middle third of the teeth to mimic the characteristics of mesial inclination and gradual translucency. 4 Incisal acrylic is mixed, applied and pressed into place. The final curing stage is now initiated.
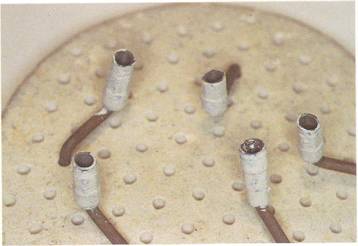
After curing, careful devesting procedures should be employed.
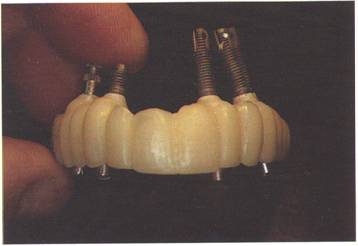
The fulcrum created by the long laboratory screws and fixture replicas can easily fracture the prosthesis. _11 hardware should be removed prior to finishing the acrylic.
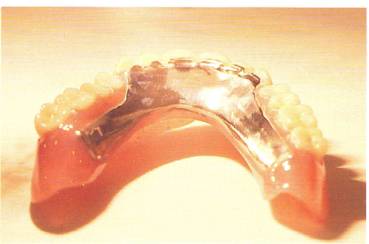
This view shows the full-arch acrylic temporary after contouring and final polishing. Extensive buccal-labial tooth root development produces a correct emergence profile. The residual ridge resorption requires this modification to provide adequate cheek and lip support.