The Carbon Fiber-Reinforced Acrylic Bridge
A carbon fiber frame (currently in development by Nobelpharma AB), may offer the patient a new concept in osseointegrated restorations. This new material is designed to substitute for the metal portion of the implant-supported substructure. The metal casting is eliminated, in addition to all metal finishing and polishing procedures. This material is much lighter than metal and is very easy to work with, especially after it is cured. The carbon fiber frame might be a good alternative where allergic reactions are a concern. It should be noted that this technique is still experimental and testing is in progress. Longterm clinical results are as yet unproven.
The clinical steps when installing a carbon fiber-reinforced acrylic bridge are the same as those used for tissue-integrated bridges with metal frameworks:
A working model is produced using a suitable impression.
A bite template is produced according to specifications.
The clinician checks connections and performs jaw registration.
An acrylic (Kerr Fastcure, Romulus MI) pattern is manufactured and the teeth are set up in wax for a try-in.
After the try-in is tested and accepted by the clinician and the patient, the carbon fiber frame is ready to be fabricated.
NOTE: Hand creams containing silicone grease must not be used while working with the type of heat-polymerized acrylic which is used in the bridge framework.
Carbon Fiber-Reinforced Bridge
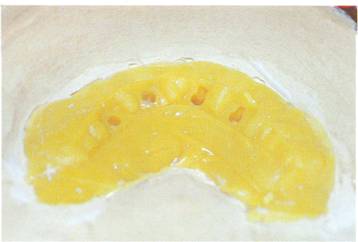
A working model is poured using a suitable impression. An acrylic pattern is fabricated for the setting of teeth.

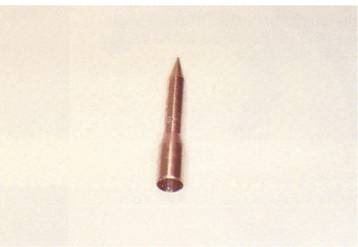
At right: brass replica, titanium cylinder and laboratory guide pin. Components assembled at left.

Myerson (Myerson, Nobelpharma Inc.) teeth are set in Class I occlusion. The master cast is deemed accurate and the patient has accepted the esthetics.

Master cast with trial setup in indexed and lubricated to receive a silicone matrix.

A silicone matrix is made of the trial setup (Polysil Putty, Accurate Set Inc.).

The teeth are removed and the matrix is placed back on the cast. The acrylic frame is checked for dimensional accuracy. A 3.5 mm to 4.0 mm width and 6.0 mm height is recommended, along with a 13.0 mm distal cantilever. The actual height is 4.0 mm at the final frame finish.

With the frame dimensions verified, a new matrix is fabricated with Ramitek (Ramitek, ESPE Inc.). The acrylic frame is surrounded lingually and buccally, pressing the material beneath the frame and around the abutment replicas. The top is left uncovered. When the matrix has set, a razor knife is used to cut the Ramitek flush with the top of the acrylic frame. The master cast is now separated from the articular mounting disk.

Half of a denture flask is filled with plaster, and the master cast with acrylic frame is embedded, bringing the plaster to the top of the Ramitek matrix.

When the plaster has set, a new 4.0 mm to 5.0 mm cap of Ramitek is placed on top of the acrylic frame to obtain a lid. The lid is pressed down onto the frame so that the guide pins leave visible impressions without penetrating the Ramitek.

The second half of the flask is pre-pared in the usual manner, assembled, filled with plaster, and closed.

When the plaster has set, the flask is split. It is normally not necessary to wash the flask in warm water as it should separate easily. The Ramitek lid is embedded in the top half of the flask.

After making sure that the mold of Ramitek has the desired extension, the frame is unscrewed.
The titanium cylinders are removed from the acrylic frame and steam cleaned.

They are mounted back to the master cast using clean 10.0 mm guide pins.

A 1.5 mm to 2.0 mm layer of heat-polymerized acrylic (Lucitone 199, Dentsply Int.) is placed on the bottom of the Ramitek mold.

Cut away approximately 0.5 cen-timeters of Ramitek at the distal ends to give a nice rounded effect.

It is now time to mix the resin for the bridge framework. Pour the activator powder into the acrylic container and stir for one minute. Leave the mixed acrylic for ten minutes (refrigerate if possible), or until all air bubbles have disappeared.

A special syringe is filled by slowly drawing the acrylic mixture into it. When the syringe is filled, an injection needle is attached to its end. The needle is now screwed onto the fiber tube using a special nut.

An empty plastic bottle is attached to the end of the tube for the purpose of collecting the surplus acrylic.

Hold the fiber package, which is incorporated in a plastic tube, in a vertical position and slowly inject the mixed acrylic into the tube from underneath. This procedure takes about ten minutes to insure that the fiber is saturated and that all air is evacuated.

Cover the lower part of the flask with plastic foil and mark the positions of the titanium cylinders and the general outline of the frame to be with a felt tip pen. The plastic foil is then transferred in an upside down position to a piece of hard foam rubber and stretched flat using pills.

The stainless steel transfer tip.
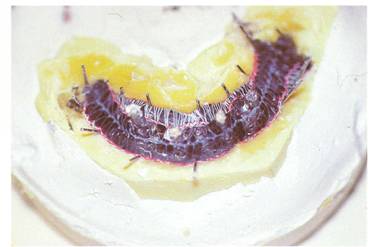
Cut off the plastic covering of the fiber and starting at one end, mold and pin the carbon fiber on the plastic foil using the felt pen outline as a guide. Surplus acrylic is used to soak the fiber package while this procedure is done.

Allow the stainless steel transfer tips to penetrate the fiber package at the marked abutment sites. Finally, the fiber package is cut to the desired distal extensions.

More acrylic is injected onto the bottom of the framework mold and the secured titanium cylinders. The fiber package is then transferred from the. foam rubber by lifting the plastic foil.

Turn the plastic foil, uncured fiber, and transfer tips over; place the entire ensemble onto the titanium cylinders and press into place using forceps, a knife or tubing.

Remove the plastic foil and fit the fiber package into the Ramitek void. To give the framework the desired shape, cut off pins are hammered into the plastic around the frame lingually, as well as buccally.
NOTE: The pins must not penetrate the fiber package.
Direct the pins inward when ham-mering so that the frame is given a high profile, while at the same time making room for the prosthesis acrylic' buccally and lingually.

When the framework has the desired profile, it may be necessary to cut one or more of the pins so as not to interfere with the plaster in the opposing half of the flask. The pins must not protrude more than the thickness of the Ramitek in the opposing half of the flask. Finally, the surplus acrylic is injected into both halves of the flask and the flask is closed. The frame is then cured for three hours at 80° C under 4 KG of pressure; then two hours at 98-100° C under the same pressure.
After the frame is cured and allowed to bench cool it is carefully broken out.
NOTE: Extra care must be taken when breaking out the frame. The master cast must be kept intact so that the matrix with teeth can be fitted to it and the master cast can be remounted on the articulator to verify the occlusion and placement of teeth.
After the master cast and frame are recovered, the black frame must be opaqued. For the sake of exper-imentation, and at the acceptance of the patient, three different opaques were used: 1) Dentacolor (Kulzer Co.); 2) D-Paque (Amco Co.); and 3) Lee Metal Primer (Lee Pharmaceutical). All opaques work well with the exception of a slight bleedthrough of the D-Paque.

The teeth are now set 011 the frame and verified for fit and esthetics intraorally. A labial view of the carbon fiber frame with the teeth set and waxed to contour.

Guide pins are used to secure the brass replicas in the frame setup, and a processing model is fabricated (see Chapter 3). Screw slots are covered with Ramitek for easy recovery. The case is processed in Lucitone 199 for nine hours at 1650 F.

The prosthesis is finished, polished, and ready for insertion. A labial view illustrates good tissue color and adequate acrylic for proper lip support.

The correct use of opaque suc-cessfully masks the black graphite frame.

The finished prosthesis is placed intraorally, with function and esthetics restored.

Good diagnostic treatment planning is evident with this carbon fiber-supported Tissue Integrated Prosthesis.
